
Building your bezls with multiple pages give your users are far better experience and a more app-like feel. This article covers how you can make a bezl with multiple pages.
You can build complex navigation in bezls using 2 different techniques. One way you can do it we will cover in the future is using:
bezl.helpers.openBezlSubviewTag(bezl,
                               'bezl-tag',
                               {width: '650px'},
                               {data: bezl.data.datasub0}).then(result => {
   // Result will contain the bezl.vars data
});
That method is extremely powerful, it let’s you chain multiple bezls together passing data to and from, but you can also do multiple pages in a single bezl using the bzl-page tag. This is an example of that:
For the user, having multiple pages allows you to use the real estate on the screen better and simplifies the user interface.
To start, we create multiple <bzl-page> tags like this:
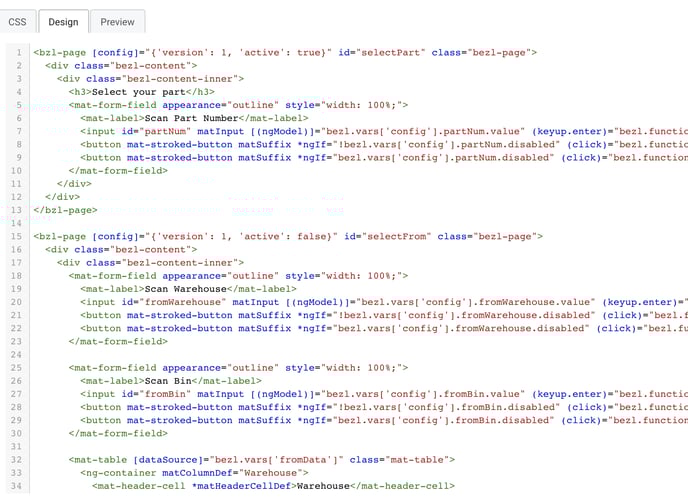
Each page needs a config which specifies which page is active by default and they need an id which is how we will call to move to a different page. In my example, when I select a part, I want to move to the selectFrom page marking that one active and the first page as inactive. I can call a bezl function to do that:
bezl.pages.open('selectFrom');
This will push the page selectFrom to the top of the stack, so that is the visible page now. The back button will navigate back to selectPart. You can have as many pages as you’d like in a bezl, but be careful because you’re pushing new pages into the stack. In my example which is a location transfer bezl, you start by scanning the part, the from warehouse and from bin, to warehouse and bin, and finally the quantity. Once the transaction is successful, we want to return to select part, but if I called to open selectPart, it would add another selectPart to the stack so going back would be really annoying. Instead you can call:
bezl.pages.back();
Which will replicate pushing the back button popping those pages off of the stack.