
With Bezlio, most of the software is in the cloud, but you do need to install the Bezlio Remote Data Broker in your network to provide users with access to on-premise data systems.
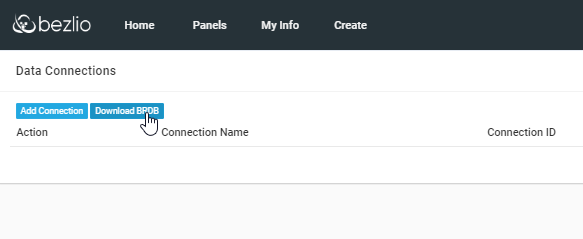
Begin by logging into https://portal.bezl.io with your account. Open the side panel for My Info and click on Update Data.

Now click the link to download BRDB.
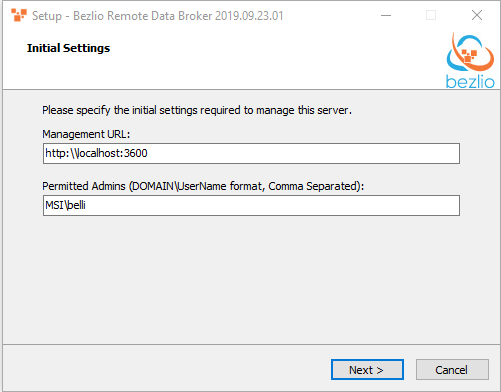
This will download the installer for Bezlio Remote Data Broker. The system requirements are pretty light, but it does require .Net Framework 4.6.1. Once the download is finished, run the installer.
The first screen will setup where you can access the portal from (in this case I can only connect to localhost from the server BRBD is installed on as a security feature) and what users are able to log into the admin portal.
Next you select what plugins you would like installed. By default only SQL Server is added, you can read about other plugins on our Github page at: https://github.com/bezlio/bezlio-plugins
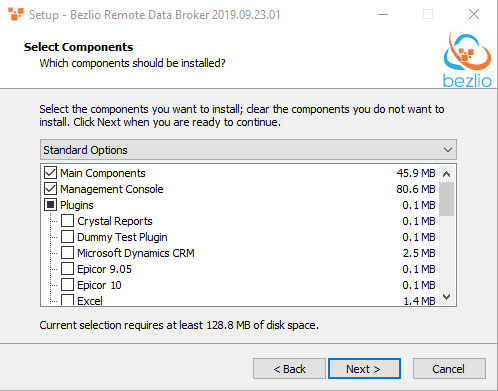
You also will specify the install folder location, and install the software.
Once BRDB is installed, we are going to configure the plugin. All of the standard plugins have a config included with them. You can access them from the installation directory you installed Bezlio Remote Data Broker into, in the Plugins folder. Since we installed SQL Server plugin, we will edit the file SQLServer.dll.config.

There are two sections here that we need to fill in. We need to update the sqlFileLocations which are folders of queries we want to publish to Bezlio users and connections which are credentials that we allow Bezlio users to use. Notice since anytime we need to use a \ for a folder location or a database instance, we need to use \\ instead. Changes can be made to plugin configs without the need to restart the Bezlio Remote Data Broker service.
Speaking of the service, now we want to start it. Open Services on the server, and click to start the service.

Note yours will probably be running as Local System, some third party libraries like the Epicor libraries, may require you to change the login to a different user.
With the service running, you can log into the admin portal configured in the installer. By default, open http://localhost:3600 on the server, note that generally we recommend using Chrome for everything.
When you login, you will see Recent Failed Transactions and Recent Successful Transactions, under the Maintain menu select Trusted Connections.

Here you setup users to access the Bezlio Remote Data Broker server. There are a lot of different ways you can configure Bezlio, we would be happy to talk to you about different strategies for managing connections. Click the button to Add A Trusted Connection.
Now we will switch to https://portal.bezl.io to create a trusted connection. From the same menu we downloaded BRDB (My Info > Update Data) click Add Connection.
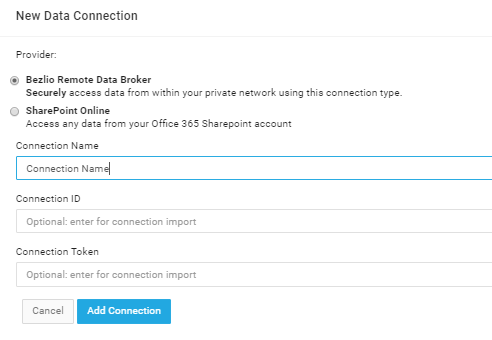
Select Bezlio Remote Data Broker, and specify a Connection Name that you will refer to when building Data Subscriptions in the editor. Leave the connection id and token blank. Click the Add Connection button.
This will give you a connection id and token to install in the admin portal. Click the copy button next to the id, and paste it into Connection Id in admin portal and do the same for the token.

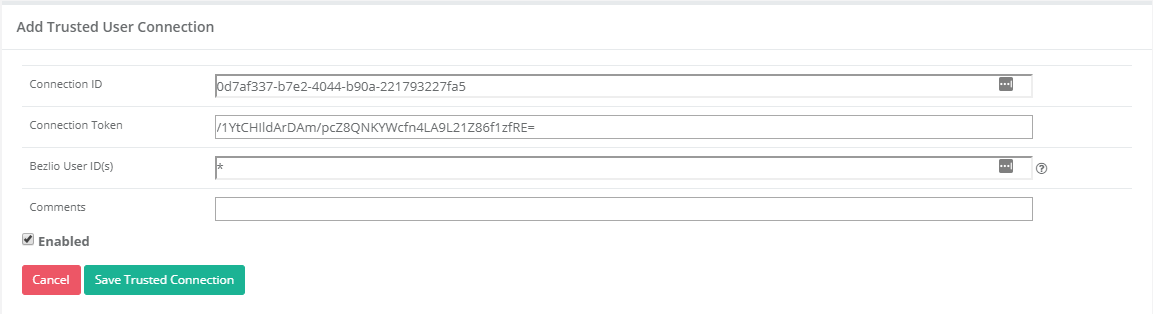
Click Save Trusted Connection, and restart the Bezlio Remote Data Broker Server.
Once the service has been restarted, in Bezlio Portal, click the Retry button and you should see your available resources load and the connection status marked as Connected.

Now you can use any configured plugins or any Dynamic plugins in building your own bezls!