
Angular Material tables are an attractive way to display data. Using bezl-table-selector is easier, but Angular Material tables are way more customizable.
Angular Material tables are a bit more complicated to use, but once you know how to build one, they are an incredibly powerful way of displaying data.
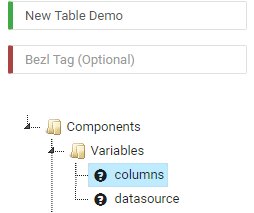
To start we will build two variables, we will call one columns and one datasource:
For datasource, we will make it a blank object by setting the value to:
{}
And for columns, we will create an array of columns matching what our Data Subscription will return. For mine this is:
["CustID","Name"]
Now we need to make our datasource variable into an Angular Material datasource. We can do this in ngOnInit:
bezl.vars['datasource'] = new bezl.material.MatTableDataSource();
Now I am going to create my layout for my table, so in the Design tab I have the following:
<bzl-page [config]="{'version': 1, 'active': true}" id="page1" (activated)="bezl.functions['activated']({'datasource': bezl.vars['datasource'], 'paginator': listPaginator, 'sort': listSort})">
   <table mat-table [dataSource]="bezl.vars['datasource']" matSort #listSort="matSort">
      <!-- CustId Column -->
      <ng-container matColumnDef="CustID">
         <th mat-header-cell *matHeaderCellDef mat-sort-header> ID </th>
         <td mat-cell *matCellDef="let row"> {{row.CustID}} </td>
      </ng-container>
      <!-- Name Column -->
      <ng-container matColumnDef="Name">
         <th mat-header-cell *matHeaderCellDef mat-sort-header> Name </th>
         <td mat-cell *matCellDef="let row"> {{row.Name}} </td>
      </ng-container>
     <tr mat-header-row *matHeaderRowDef="bezl.vars['columns']"></tr>
     <tr mat-row *matRowDef="let row; columns: bezl.vars['columns'];" (click)="bezl.functions['clickList'](row)"></tr>
   </table>
   <mat-paginator [pageSizeOptions]="[5, 10, 25, 100]" #listPaginator></mat-paginator>
</bzl-page>
So there is a lot going on here, there is a great reference available here:
https://v7.material.angular.io/components/table/overview
So walking through the example, we start with our page. On the page we have a function called (activated) which is called when someone navigates to the page. Here we are calling a function in Bezlio called 'activated' and into that we are passing our datasource we created in ngOnInit, the paginator we define in the markup later on called listPaginator and the sort we define later in the markup called listSort. In the activated function we have the following:
parm.datasource.paginator = parm.paginator;
parm.datasource.sort = parm.sort;
So for the passed datasource, we are setting the paginator and sort.
Next we create our table, define the datasource, and create our matSort object assigning it to a variable in markup called #listSort. What is cool about this format, is it allows us using the (activated) function on the page to get references to HTML elements like that. Next we create each of our columns in the ng-container structure. We reference them based on the string array we created called 'columns' so for instance my data has a CustID and Name available.
We then create a mat-header-cell which is the header, and we can specify it is a mat-sort-header which allows that header to be sorted. Then we create the mat-cell with let row, which allows us to reference the field we want from our datasource via binding with:
{{row.CustID}}
or
{{row.Name}}
Then we set our mat-header-row and specify our columns variable in *matHeaderRowDef. So here we pass our array of columns, which we used in the ng-container section. We also create the mat-row, again specifying the columns and here we can add a (click) method which will be called when we click on a row.
Finally we can create a mat-paginator, again that we passed into our (activated) function. This is optional, but really nice for mobile applications especially.
I know that is a lot, but now we are almost done! The last bit is that we need to fill data in our datasource. We can do this in onDataChange:
bezl.data = dataResp;

switch(bezl.data.changed) {
   case 'GetList':
      bezl.vars['datasource'].data = bezl.data.GetList;
      break;
}
In this case, I am filling our datasource data, with the results of a Data Subscription I created called GetList. Everything else will be done automatically! When bezl.data.GetList is updated, it updates the data in our datasource and is reflected on screen. The table will support pagination and filtering, and you can use things like date pipes or currency pipes to format data in the cells.
Now let's say you want to add filtering to your table. You could use a standard input by adding this above <table...
<mat-form-field>
   <input matInput (keyup)="bezl.functions['applyFilter']({'value': $event.target.value, 'datasource': bezl.vars['datasource']})" placeholder="Filter">
</mat-form-field>
And the corresponding applyFilter function:
parm.datasource.filter = parm.value.trim().toLowerCase();

if (parm.datasource.paginator) {
   parm.datasource.paginator.firstPage();
}
Which will automatically filter the data as you type into the input field. It automatically adjusts it to not be case sensitive and moves the paginator back to the first page.
The default filter will filter based on all of the values in the dataset, which could be confusing to a user. To filter on only certain fields, you can use the filter predicate. You would configure this in ngOnInit after you create your datasource:
bezl.vars['datasource'].filterPredicate = (data: any, filter: string) => {
  return (data.CustID.toLowerCase().indexOf(filter) > -1 || data.Name.toLowerCase().indexOf(filter) > -1);
};
Now we can get a bit fancier using that same function, but using our bzl-search-input instead of using an input field:
 <bzl-search-input class="bezl-customer-search" id="search1"
   [config]="{'version': 1, 'label': 'Search Customer', 'defaultFocus': true}"
   (valueChange)="bezl.functions['applyFilter']({'value': $event.detail, 'datasource': bezl.vars['datasource']})"
></bzl-search-input>
What is nice about that, is that on Android devices the defaultFocus in the config means that when a user navigates the the screen, that field will be automatically selected. Note that iOS devices do not allow defaultFocus (it's something about iOS, they dont like the on-screen keyboard to automatically launch when you navigate and prevent that from functioning).