
Custom user properties are a great way to store additional information about a user on their profile. Typically we use this for things like their ERP user information making integration easy.
To add a custom user property, when logged into https://portal.bezl.io click to open the My Info menu and select Update Profile.

Now click to expand the section labeled Custom Properties:
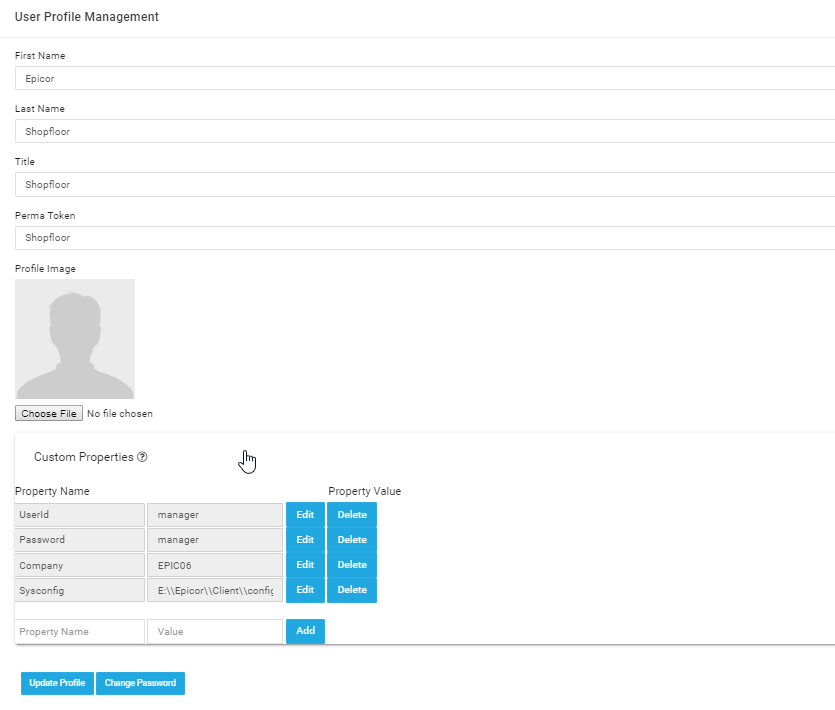
To add a new property, add in a property name and a value and click the Add button. Note the profile automatically saves when you add, edit, or delete properties so you do not need to click Update Profile.
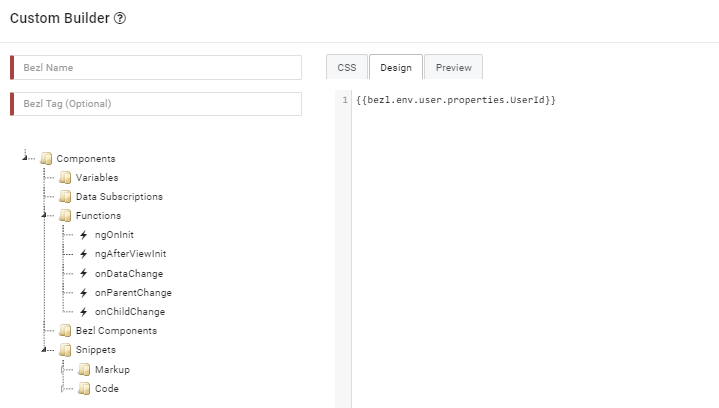
Now let’s use that profile in a bezl. I’m going to start in a blank bezl (open the ‘Create’ menu, click ‘Visit Builders’, click ‘Custom Builder’, click ‘Run Builder’). We will start by just showing the value in the markup using Angular syntax. You access the user properties via:
bezl.env.user.properties.propertyName
So in my example:
When I click to Preview, this is what I get:
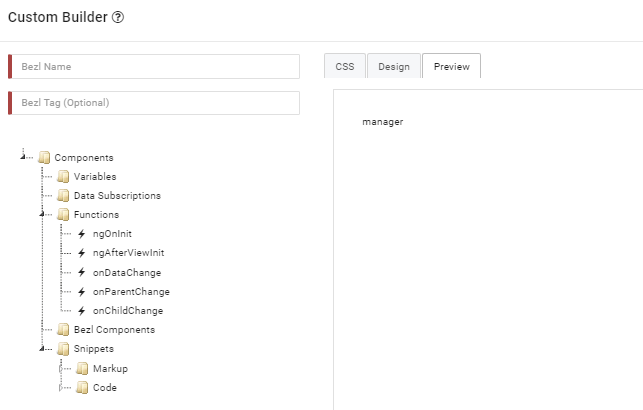
Well that is something I suppose, but not really compelling. Using custom user properties in data subscriptions are way more fun! I started by building a Dynamic plugin that just returns whatever value we pass into it.
Here is what I built:
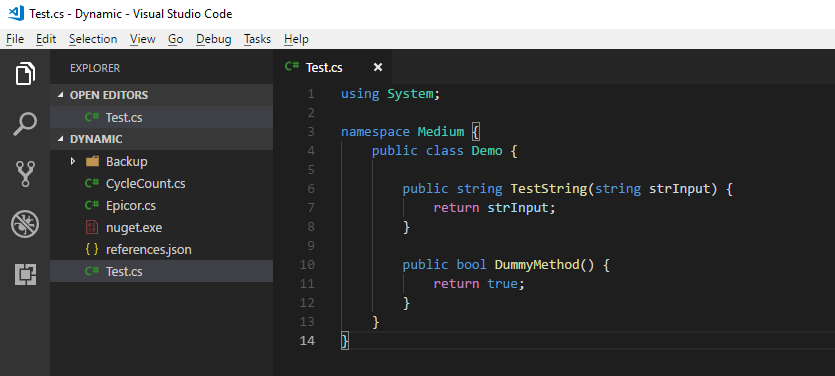
Note, I need 2 methods in a Dynamic plugin. This is a UI issue in the builder right now, the drop down needs two values to be able to select from for a plugin. Hopefully by the time many of you read this we’ll get that patched up, but for now just make sure you have at least 2 methods in the Dynamic plugin.
In my plugin, I have a TestString method that just returns whatever we pass into it. It’s up to your creativity how you can use these, as you can see in my sample we have done things like pass application credentials in if you’re into that kind of thing. This is just C# code, so be creative and go wild!
Now I’m going to add a data subscription to my bezl.

So for the input property for our method, I am passing in bezl.env.user.properties.UserId
When the data subscription runs, it automatically fills out variables you add into arguments like that. So when we click on the Verify button we get:

Which verifies that the user property is being passed as a parameter to the C# code on the server, that code is being evaluated and executed, and it’s returning that value!